White Balance
While the human eyes are equipped with a very sophisticated color system that automatically adjusts colors in different lighting situations, cameras, on the other hand, don’t automatically compensate for different color temperatures. Instead, unless you use a setting that compensates for different color temperatures, cameras capture the light and color temperatures that are actually in a scene, not what your eyes see.
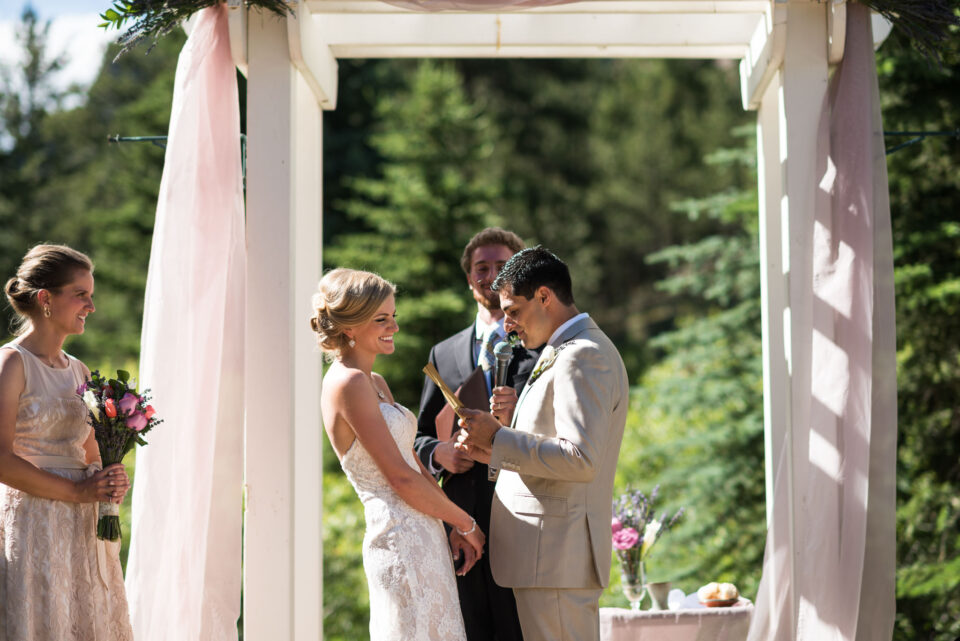
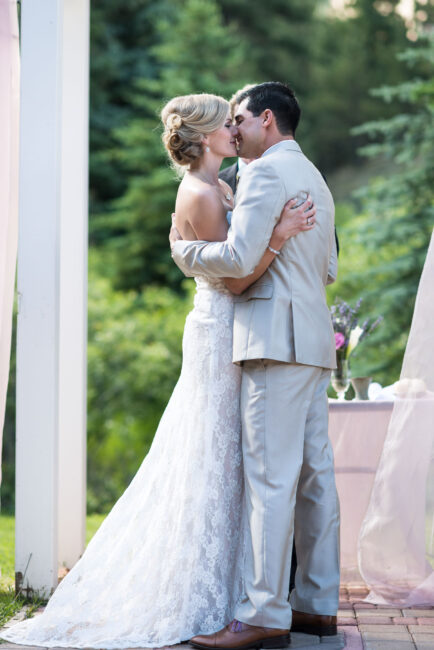
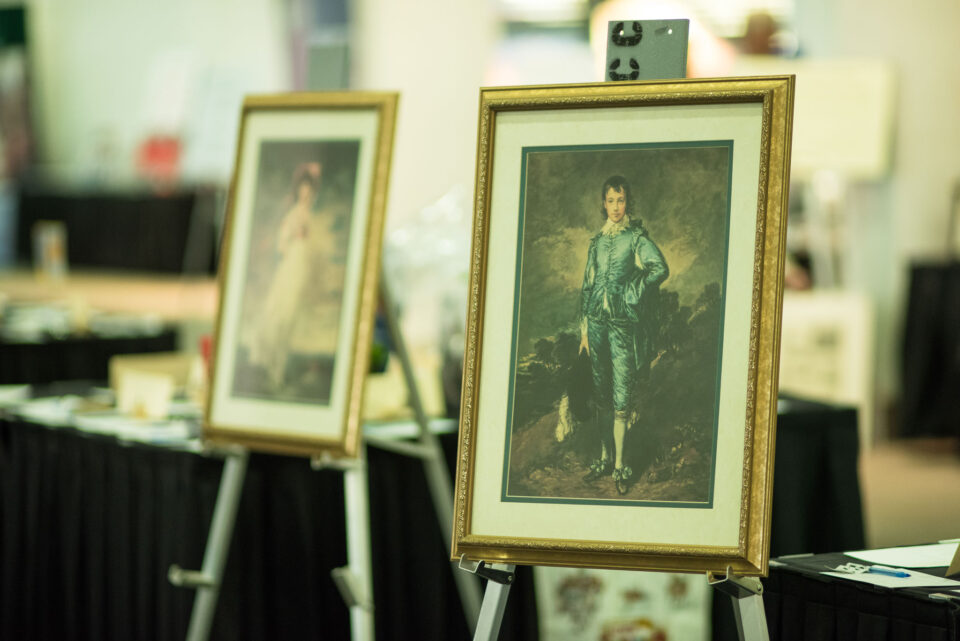
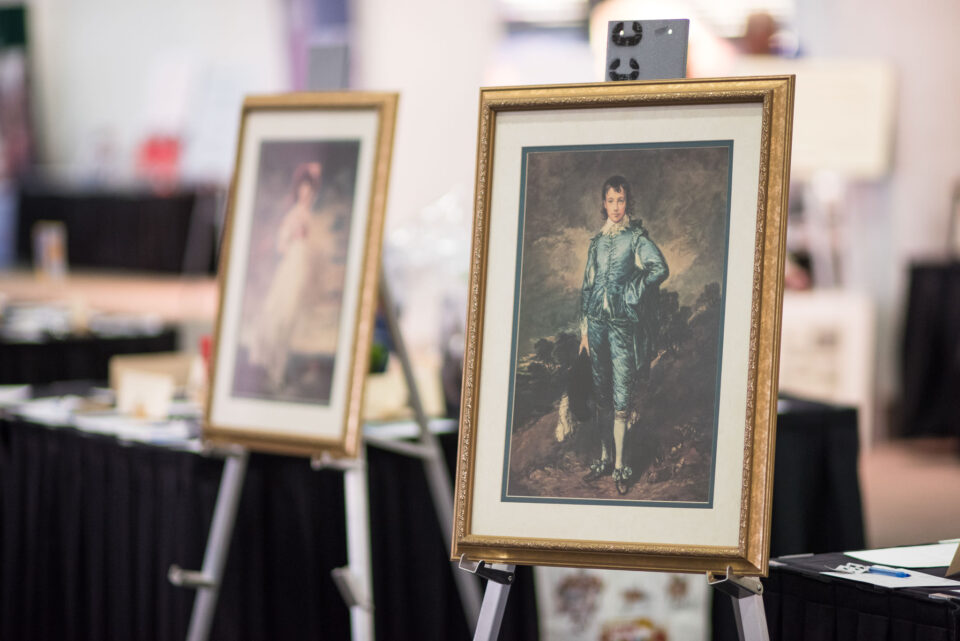
If an incorrect white balance setting is used in a camera, images turn out unnatural, with bad skin tones and color shifts. Here is an example of both correct and incorrect White Balance:
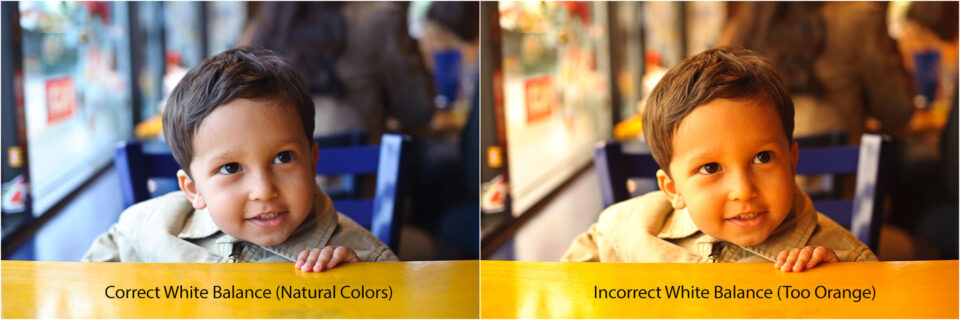
As you can see, the image on the left feels more natural and the skin tones look good, while the image on the right is way too orange. The second image clearly needs its white balance adjusted to eliminate the orange tones.
Color Temperature
Color temperature, denoted in Kelvin (K), is a fundamental characteristic of light that plays a pivotal role in shaping the visual atmosphere of a scene. Despite appearances, different light sources can exhibit significant variations in color temperature. Picture a room illuminated by rows of overhead fluorescent lights – you might observe subtle differences in color among the bulbs, whether due to age or brand discrepancies. Even natural light, such as sunlight, can display varying color temperatures, noticeable between noon and sunset.
A benchmark for neutral color temperature is sunlight at noon, falling within the range of 5200-6000 K. Many external flash units are factory-set within this range, aiming to replicate the characteristics of natural sunlight. In contrast, incandescent light bulbs, emitting a warm/orange typically have a color temperature of around 3000 K. On the other end of the spectrum, shaded areas tend to cast a (cool/blue) with a color temperature of approximately 8000 K.
To offer a clearer perspective, consider the following chart, outlining the typical Kelvin measurements for various light sources:
| Light Source | Color Temperature (K) |
|---|---|
| Candle Flame | 1,000 to 2,000 |
| Household Lighting | 2,500 to 3,500 |
| Sunrise and Sunset | 3,000 to 4,000 |
| Sunlight and Flash | 5,200 to 6,000 |
| Clear Sky | 6,000 to 6,500 |
| Cloudy Sky and Shade | 6,500 to 8,000 |
| Heavily Overcast Sky | 9,000 to 10,000 |
This spectrum of color temperatures underscores the dynamic interplay of light in photography, where the choice of light source can significantly influence the mood and appearance of the captured image. Understanding and manipulating color temperature equips photographers with a powerful tool for crafting visual narratives.
Color Temperature of Different Light Sources
Photographically speaking, things get tricky when the scene you are photographing has multiple light sources with different color temperatures. This situation is known as mixed lighting. Take a look at the photo below:
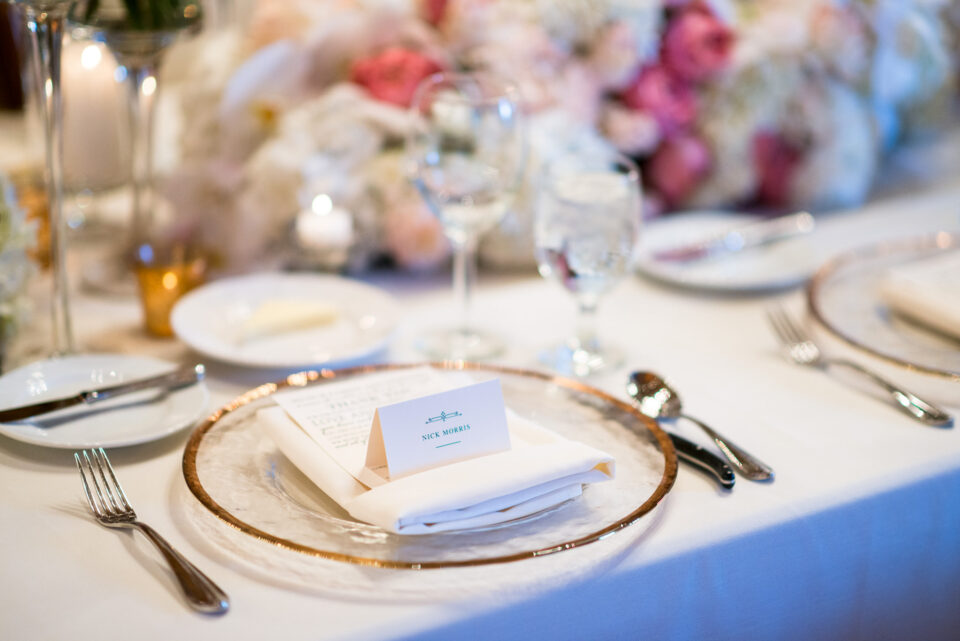
Mixed Light: Daylight + Tungsten, Temperature: 2600 K
This scene had chandeliers hanging over the tables that had incandescent bulbs in them, while indirect sunlight was coming through the windows behind me. After adjusting the white balance for the tungsten overhead lighting (which I’ll explain how to do in a bit), the sunlight that is lighting the side of the tablecloth and the flowers on the right looks blue.
Color Temperature of Different Light Conditions
It’s not just different light sources that can give you different color temperatures. Different lighting conditions can also have different color temperatures. Take a look at these two photos:
 Sunlight – Sunny, Camera WB @ 5500 K
 Sunlight – Cloudy, Camera WB @ 5500 K
They were taken only moments apart, but between the first and second image the sun went behind a cloud, creating shade and giving a cooler color temperature. The light source (the sun) didn’t change, but the conditions did.
What is White Balance?
Now that the concept of color temperature is clear, grasping the idea of white balance becomes straightforward. Essentially, white balance functions to harmonize the color temperature in your image. How does it achieve this? By introducing the opposite color to the image, the aim is to restore the color temperature to a neutral state. In practical terms, this means that when an image is correctly white balanced, whites should appear genuinely white, without the undesired influence of a blue or orange tint.
To put it simply, white balance in digital photography involves the adjustment of colors to achieve a more natural appearance in the image. The objective is to eliminate color casts, ensuring that the colors in the photograph align more closely with the true colors in the scene.
The convenience lies in the fact that adjusting white balance is a straightforward process. Whether done in-camera or during post-processing using software, this technique allows photographers to fine-tune colors easily. By mastering white balance, photographers gain the ability to enhance the realism of their images and portray scenes more authentically.
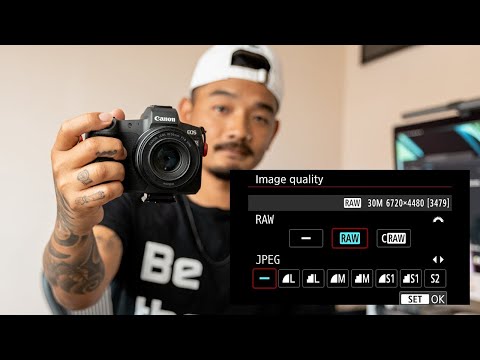
In-Camera White Balance
Most cameras come with the option to manually set or adjust white balance. Typical settings include “sun”, “shade”, “tungsten” and “fluorescent”. Some cameras come with the option to manually set a color temperature by choosing a specific Kelvin value.
Let’s take a look at a few examples:
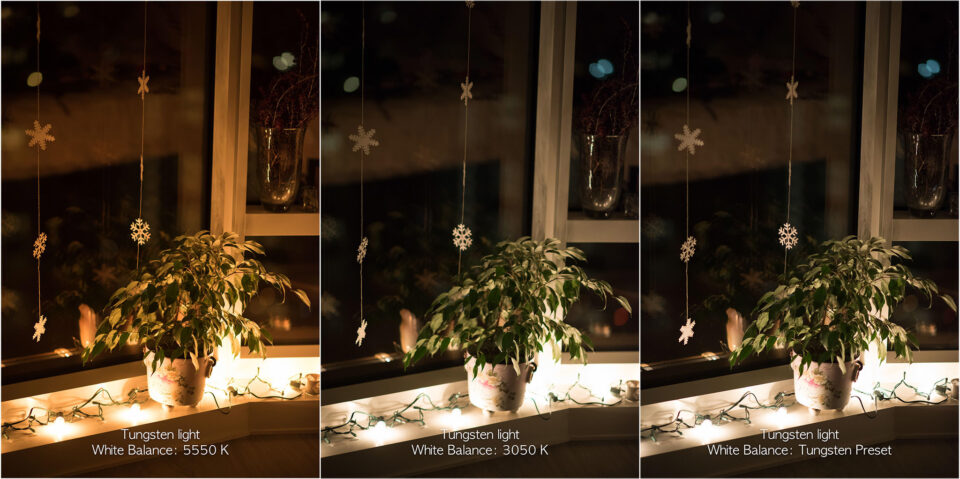
In the image on the left, you can see how orange the light bulbs look when I have my camera set to a neutral white balance, but once I change it to the color temperature of the bulbs (either manually or with a preset white balance), they look normal. Why is that? My camera is “cooling” down the color temperature of the bulbs by adding blue to the photo, giving us the appearance of white light. Notice that while the light bulbs now look white, the bokeh in the background now looks blue.
Still having trouble understanding what’s going on? Take a look at these images of the same scene that were taken in daylight:
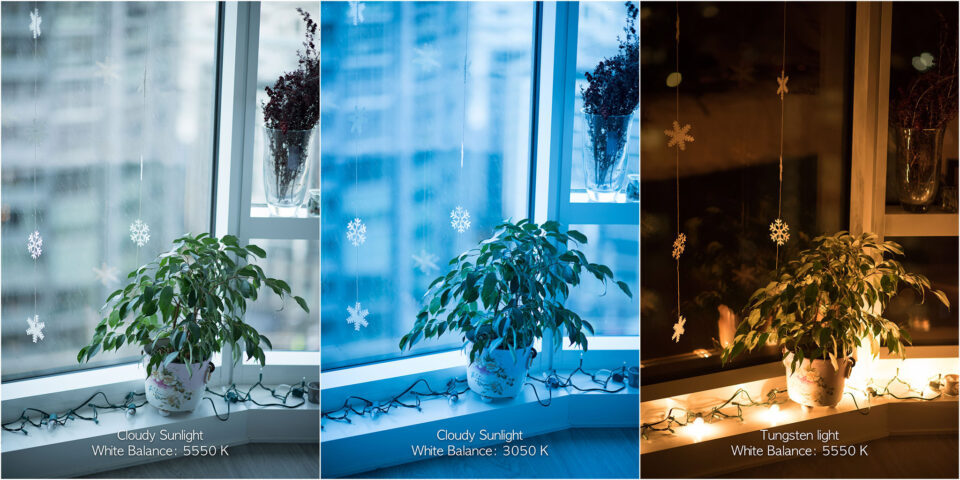
Now that it’s daylight, you can see that 5500 K is the correct white balance for the color temperature. What happens if I set my white balance to 3050 K in daylight? The image turns blue! This is how much blue was added to the photo of the orange incandescent bulbs to balance the orange and make the color temperature of the incandescent light look normal.
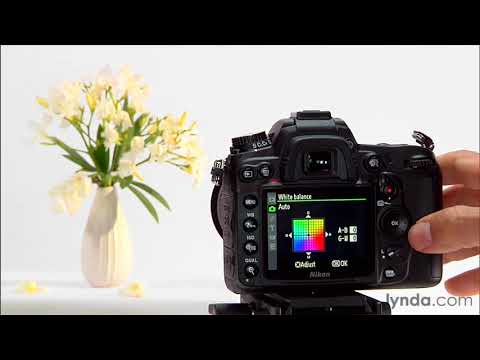
How to Change White Balance in Your Camera
White balance can be changed very easily on most cameras. On most DSLR and mirrorless cameras, there should be a button that allows you to quickly change between different white balance presets. On Nikon DSLRs, for example, you will often find a “WB” button – holding that button and moving the rear dial will allow you to switch between different white balance settings, such as “Incandescent”, “Fluorescent”, “Direct Sunlight”, etc. If you don’t have a white balance button, or you prefer to select white balance through your camera menu, you can often find that setting in the general “Shooting” menu. For example, if you have an entry-level Nikon DSLR, simply navigate to the “Shooting Menu” and scroll down until you get to “White Balance”. Once there, you will be presented with a number of different presets, as shown below:
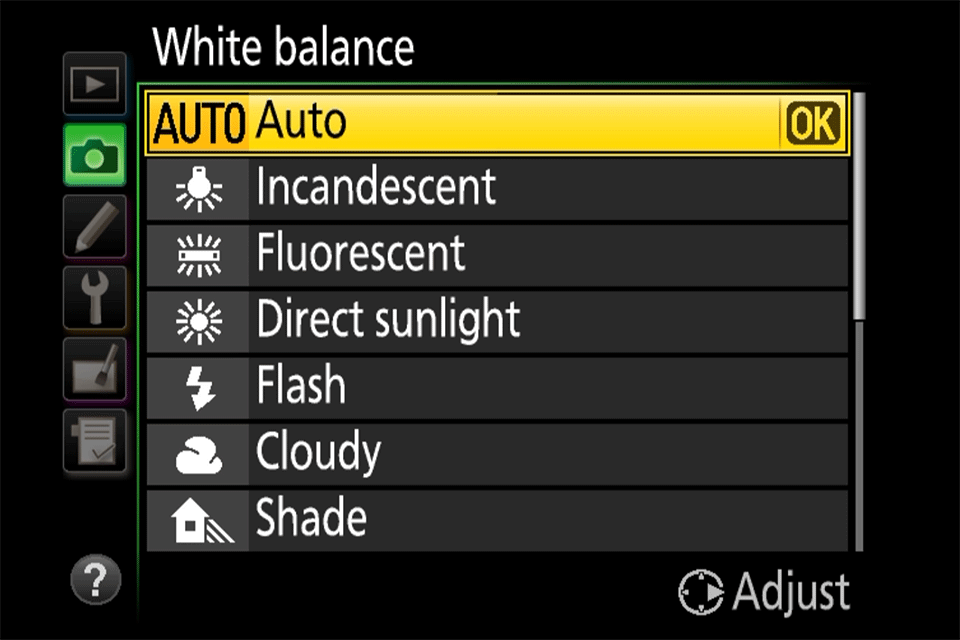
Here is the list of common presets for most Nikon DSLR and mirrorless cameras:
- Auto (A) – Default WB setting and what I use all the time when I shoot RAW. The camera automatically guesses the WB depending on ambient light and use of flash. Some cameras have more than one auto setting for different environments / lighting situations.
- Incandenscent (Light Bulb) – Use it strictly under tungsten light bulbs or the image will look very blue.
- Fluorescent (Glowing Tube) – Use if photos look too green or when under fluorescent lights. Since there are many different types of fluorescent bulbs, some cameras provide several different selections for this setting.
- Direct Sunlight (Sun) – Used when shooting outdoors with the sun shining on the subject.
- Flash (Lightning Bolt) – Used when utilizing on-camera flash.
- Cloudy (Cloud) – Used in cloudy days or in shades. Will yield warmer images than sunlight.
- Shade (House with a Shadow) – Warmer than cloudy, adding orange colors to the photograph. Good for sunsets and shades.
- Choose Color Temperature (K) – Lets you manually change the Kelvin value (typically from 2,500 to 10,000).
- Preset (PRE) – Used for color matching with a white balance card.
The best way to obtain the correct white balance is through the “Preset (PRE)” setting, but you will need a white balance card (also known as “grey card”, or “18% gray card”), and your camera needs to be able to read it. If you visit your camera’s white balance menu setting, you should be able to see something that says “Preset” (Nikon) or “Custom White Balance” (Canon):
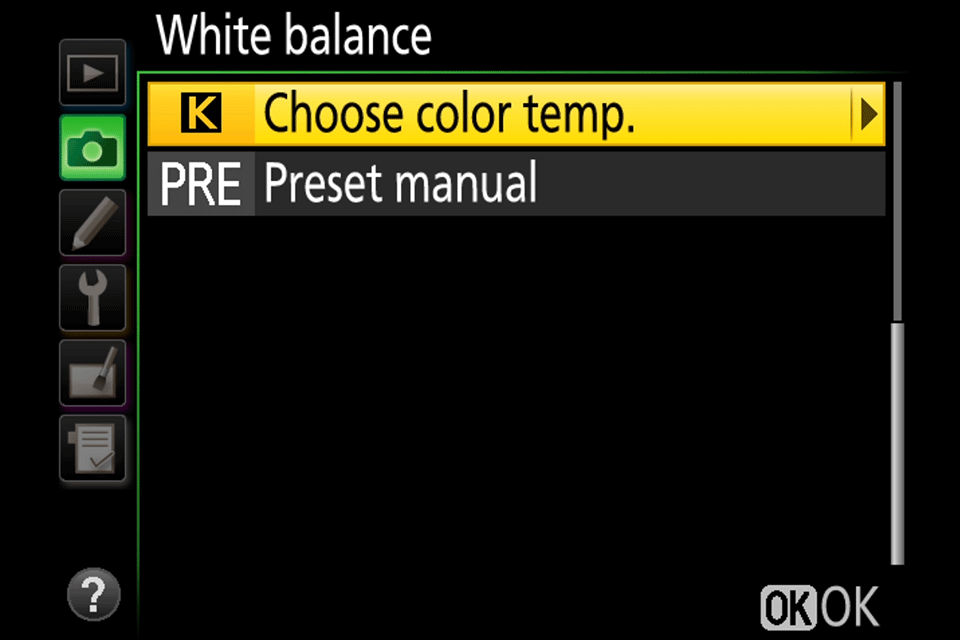
The process involves holding the white balance card in front of the camera lens in order to have the camera read the correct color temperature of the light that gets reflected from the card. Some cameras might require you to take a picture of the white balance card first, then read the colors off of it to determine the correct white balance.
Keep in mind that this is not a permanent camera setting – each time your light conditions change, you will need to re-start the process.
The Relation Between Color Temperature and White Balance
Now that you know the difference between color temperature and white balance, you should be able to see the relationship between them. They are the opposites! Unfortunately, since photographers mainly work with white balance, we sometimes get confused when referring to color temperature values.
Personally, I almost always shoot at a fixed Kelvin of around 5500 K. When I photograph interiors that are lit by incandescent bulbs, my images all look orange. Since I shoot RAW, it’s not a problem! In Lightroom I just “cool them off” by changing my white balance to around 3000 K. For shade, I “warm up” my shady images by changing the white balance to around 6500 K. In my head, higher Kelvin values start to equate to warm light and lower Kelvin values start to equate to cool light.
But remember, I’m balancing the color temperature! What I’m actually doing is adding the opposite color temperature to my image. I’m so used to thinking of 3000 K as cool, when I see that the color temperature of an incandescent bulb listed as 3000 K, it takes me a minute to remember that the 3000 K I think of as a cool color temperature is actually a cool white balance.
So now for the big conclusion you can draw from all of this. If you set your white balance to the color temperature of the scene you’re photographing, it should look great! If you’re photographing light bulbs that have a color temperature of 3000 K and you set your camera’s white balance to 3000 K, the light should look white! Now here’s the bad part. There’s really no way to measure color temperature, so you’re left approximating or adjusting in post-processing.
Using Auto White Balance
If you prefer shooting JPEG or just don’t want to worry about color correction after the image is taken, most (if not all) cameras and post-processing software come with the option to use auto white balance, or AWB. With AWB, your camera evaluates the scene that you’re photographing and decides on the best white balance to use. It will typically reference a neutral color in your scene such as white or grey to determine the correct white balance. Depending on your camera and the scene you’re photographing, your results will range from perfect to not close at all.
Using Auto White Balance In Camera
When using auto white balance in camera, your results will vary depending on the lighting conditions you’re shooting in. For example, if you’re shooting in daylight the white balance of your photos will typically look correct. Unfortunately, mixed lighting can really give AWB troubles, so you might still end up needing to adjust the white balance in post-processing software.
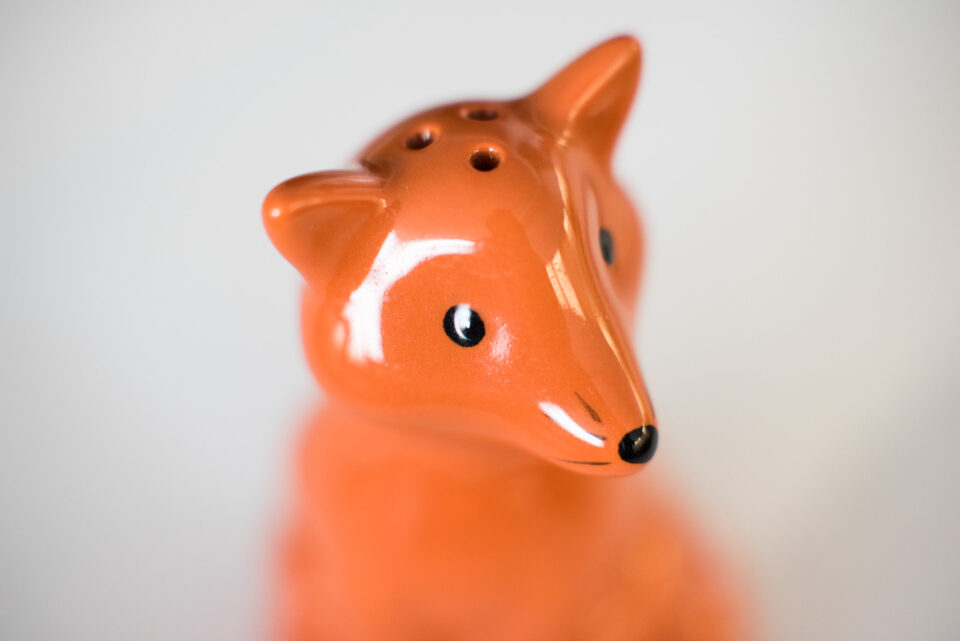
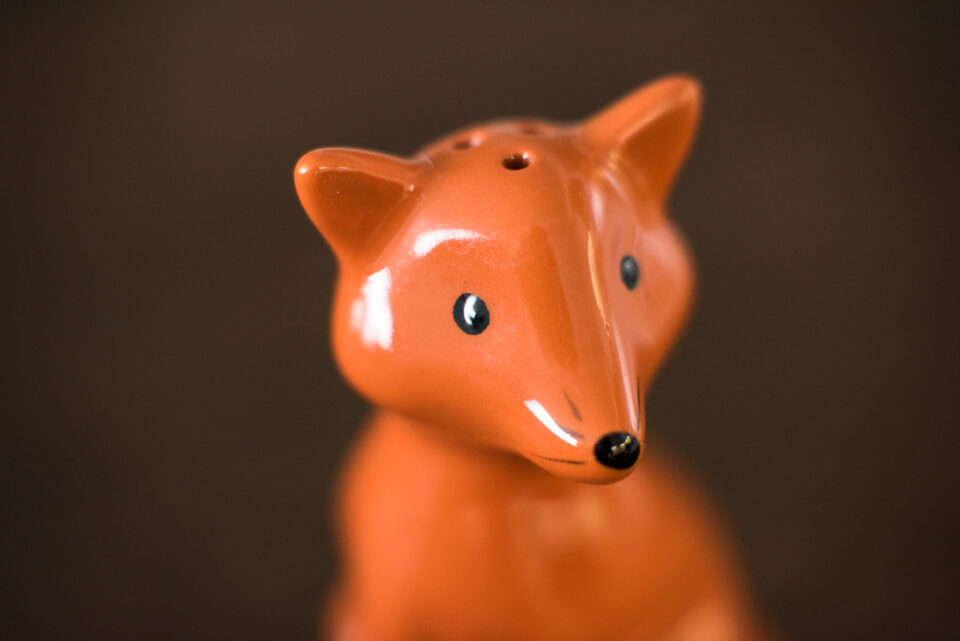
Even daylight can fool auto white balance. Here’s a set of images of an orange fox on a brown table that really demonstrate how inconsistent auto white balance can be without a neutral color in the image for your camera to reference:
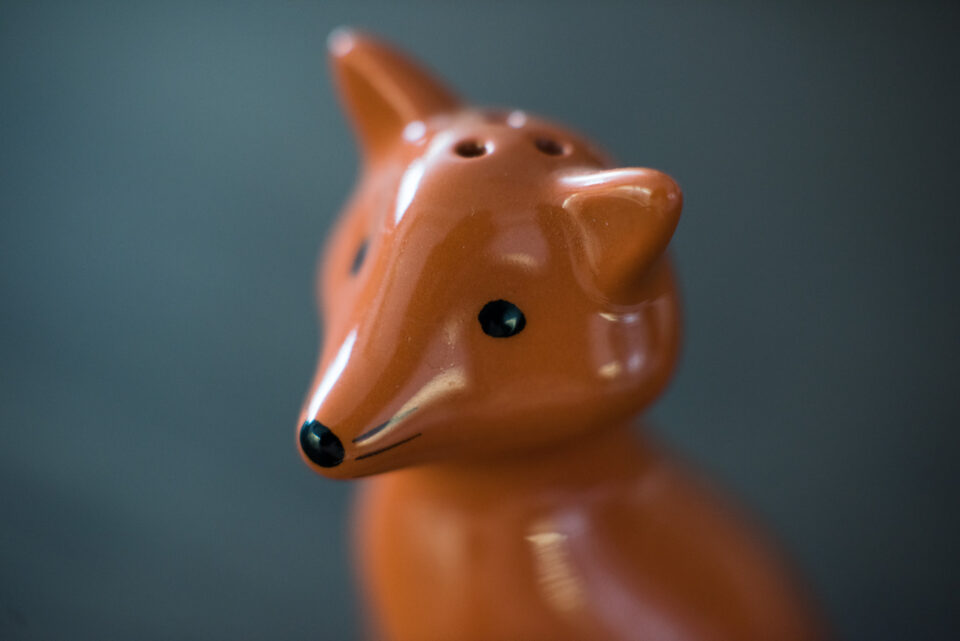 Auto White Balance – As shot 3600 K
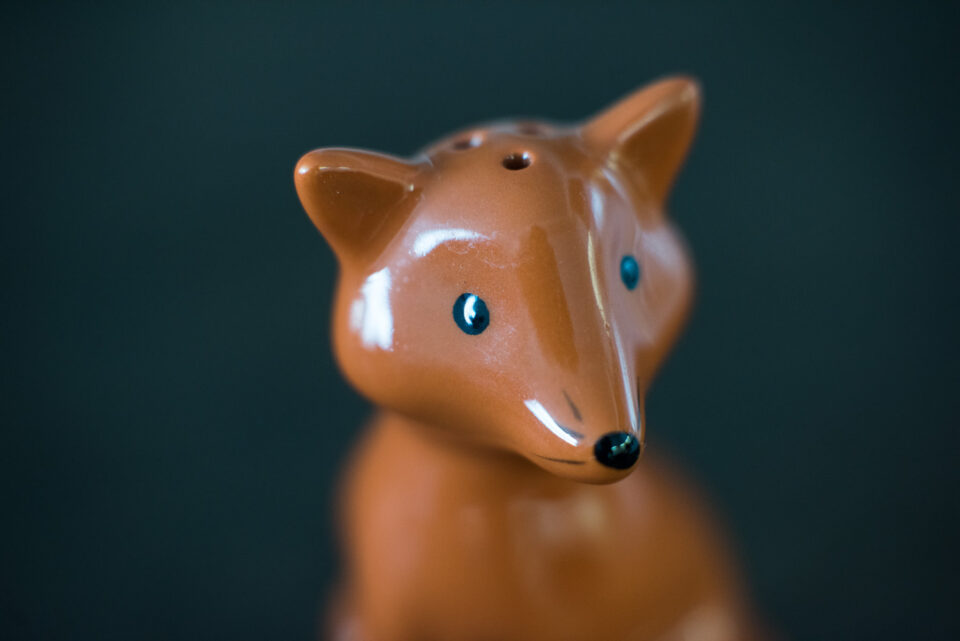 Auto White Balance – As shot 2850 K
 Auto White Balance – As shot 5600 K
 Auto White Balance – As shot corrected
Auto White Balance – Corrected 5600K All of these images were photographed in the same light. You can see how much of a difference the background makes when using auto white balance. In the third image, simply adding a white background helped the camera get the correct white balance. You can see the last image is the same as the 2nd image, only with a correct white balance (adjusted in Lightroom).
Different cameras have different auto white balance capabilities. As with any technology, more recent cameras seem to be more accurate than older cameras. You’ll also typically have more advanced capabilities in more expensive cameras. That’s not to say that the AWB systems in entry-level cameras are not good. For example, my iPhone does a good job with AWB, but chances are my Nikon DSLR does a better job getting it right more consistently.
Tint
In addition to color temperature, light can also have a tint. While color temperature ranges within the orange/blue spectrum, tint ranges within the green/magenta spectrum. Major tint adjustments are typically not necessary when color correcting images taken in daylight. If you tend to photograph subjects that are lit by artificial light sources such as tungsten, fluorescent, LED or mercury vapor lights, you’ll find yourself adjusting tint much more than with natural light.
Here’s an example of a scene that was lit by fluorescent lights:
Fluorescent Light – Temperature: 4450 K, Tint: -5
Fluorescent Light – Temperature: 4450 K, Tint: +50
You can see that the first image has a very strong green tint. By changing the tint (adding magenta) but leaving the color temperature untouched, the white balance has been corrected.